Introduction
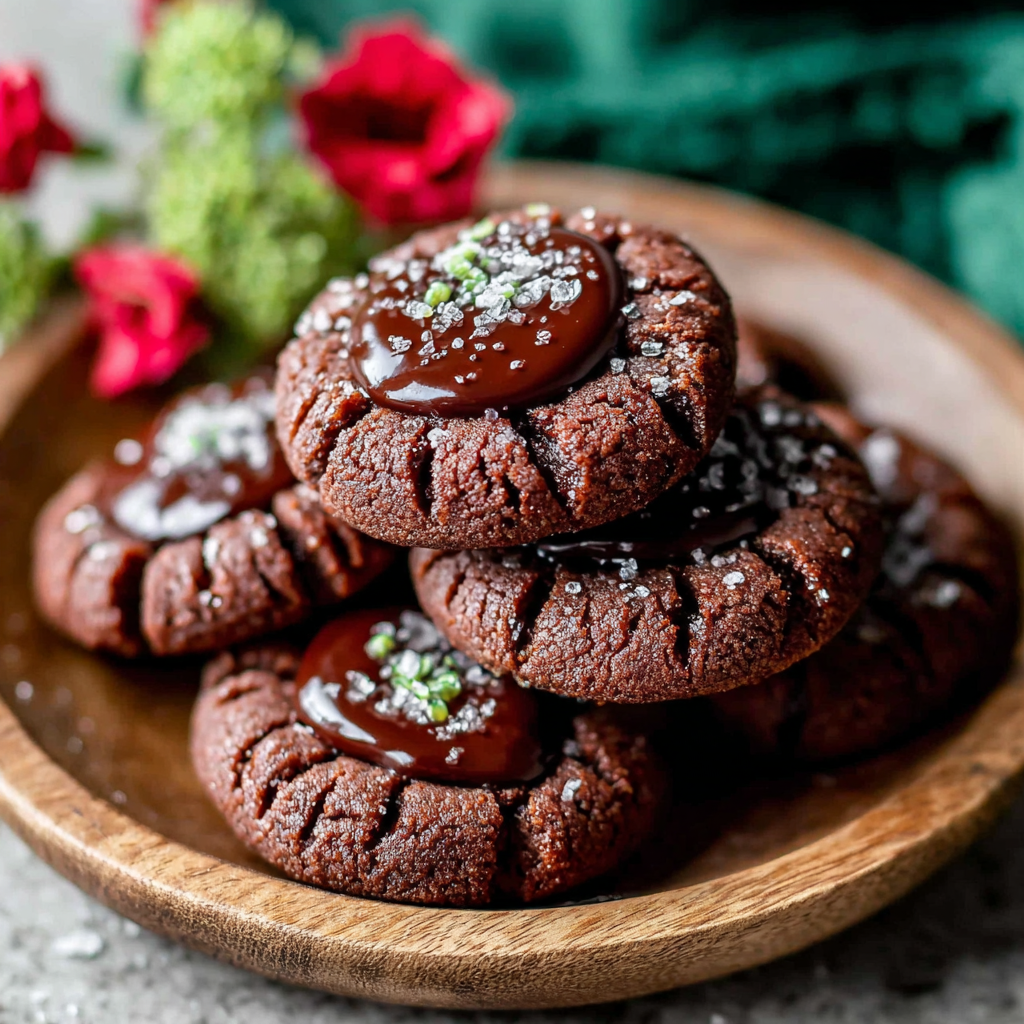
Chocolate thumbprint cookies are a delightful treat that combine the rich flavors of chocolate with the sweetness of a creamy filling. The slight crunch on the outside gives way to a soft center, making each bite a textured pleasure. These cookies are perfect for holiday gatherings, afternoon tea, or simply as a sweet indulgence.
What makes them truly special is the versatility of their filling, typically a luscious chocolate ganache or fruit preserves. This adaptability allows you to tailor these cookies to suit your taste preferences. Plus, they are simple to make, which means you can whip them up without the need for special baking skills or hours in the kitchen.
Ingredients
- 1 cup unsalted butter, softened
Butter adds richness to the cookies, helping to create a tender texture. By using unsalted butter, you have better control over the saltiness of the final product. - 1 cup granulated sugar
Sugar not only sweetens the cookies but also aids in achieving a desirable texture. This ingredient helps create a nice crumb during baking. - 2 large egg yolks
Egg yolks contribute moisture and richness, enhancing the overall flavor of the cookies. They also help bind the ingredients together. - 2 teaspoons vanilla extract
Vanilla extract enhances the flavor profile of the cookies, adding warmth and a touch of complexity that complements the chocolate. - 2 cups all-purpose flour
Flour provides structure to the cookies, creating balance while promoting a soft, chewy consistency. - 1/2 cup unsweetened cocoa powder
Cocoa powder delivers the chocolate flavor that defines these cookies. It also contributes to the texture, giving them a slightly dense quality. - 1/2 teaspoon baking powder
Baking powder is a leavening agent that helps the cookies rise, preventing them from becoming too flat during baking. - 1/4 teaspoon salt
A small amount of salt balances the sweetness and enhances the overall flavor of the cookies. - 1 cup chocolate ganache or fruit preserves for filling
The filling can vary based on personal preference, either adding rich chocolate flavor or a fruity tartness that contrasts deliciously with the cookie base.
Directions & Preparation
Step 1: Preheat your oven to 350°F (175°C). Line a baking sheet with parchment paper.
Preheating the oven ensures the cookies bake evenly from the start. Using parchment paper prevents the cookies from sticking and allows for easy cleanup.
Step 2: In a large mixing bowl, cream together the softened butter and granulated sugar until light and fluffy, about 3-5 minutes.
Creaming the butter and sugar incorporates air into the mixture, which helps create a lighter texture in the finished cookies. It's important to beat until the mixture is pale and fluffy.
Step 3: Add the egg yolks and vanilla extract to the creamed mixture, and mix until well combined.
Incorporating the wet ingredients at this stage ensures they are evenly distributed, which is crucial for uniform flavor and texture throughout the cookies.
Step 4: In a separate bowl, whisk together the flour, cocoa powder, baking powder, and salt to combine.
Mixing the dry ingredients separately helps prevent clumping of the cocoa and ensures even distribution of the leavening agent, salt, and flour throughout the dough.
Step 5: Gradually add the dry mixture to the wet ingredients, mixing until just combined. Do not overmix.
Overmixing can lead to dense cookies. Stirring until just combined ensures a tender cookie with the right texture—lighter and chewier.
Step 6: Using a tablespoon or cookie scoop, drop rounded balls of dough onto the prepared baking sheet, spacing them about 2 inches apart.
Spacing is key for even baking; if they’re too close together, the cookies might merge. The size of the dough balls will determine the thickness of your cookies.
Step 7: With your thumb or the back of a teaspoon, gently press a well into the center of each cookie dough ball.
Creating the thumbprint is what distinguishes these cookies. It provides a space for the filling but also affects the overall shape and texture of the baked cookie.
Step 8: Bake for 10-12 minutes, or until the cookies are set around the edges but still soft in the center.
Baking until the edges are slightly firm helps maintain the desired softness in the middle. Overbaking could result in dry cookies, so keep an eye on them as they finish.
Step 9: Remove cookies from the oven and let cool on the baking sheet for a few minutes before transferring them to a wire rack.
Cooling on the baking sheet briefly allows the cookies to firm up and makes transferring them easier. This prevents them from breaking apart.
Step 10: Once the cookies are completely cooled, fill each thumbprint with chocolate ganache or fruit preserves.
Filling the thumbprints with ganache or preserves adds an exciting flavor contrast to the rich chocolate cookie. Be generous, as the filling will enhance each bite.

Customizing Your Fillings
While traditional recipes often call for chocolate ganache, experimenting with various fillings can offer delightful surprises. Consider using fruit preserves such as raspberry or apricot for a tart contrast, or even peanut butter for a nutty twist. These variations can surprise the palate and elevate the classic thumbprint cookie to new heights.
Tips for Perfect Texture
Achieving the ideal texture for these cookies is crucial. Make sure your butter is at room temperature for maximum aeration during the creaming process. Avoid overworking the dough once you mix in the flour, as this can develop the gluten too much, leading to cookies that are less tender than intended. Bake just until the edges are set for soft centers.
Pairings to Enhance Enjoyment
Chocolate thumbprint cookies are incredibly versatile and can be paired with various beverages and accompaniments. Serve them alongside a glass of milk, hot cocoa, or coffee to help balance the richness of the chocolate. For added flair, consider a scoop of vanilla ice cream on the side, which complements the cookies’ flavor profile beautifully.
FAQs
What if my cookies are too thick after baking?
If your cookies are too thick, you may have overmixed the dough or used too much flour. Measure accurately and avoid overworking the dough for a lighter cookie.
Can I substitute the cocoa powder with melted chocolate?
Yes, you can substitute cocoa powder with melted chocolate. Use about 4 ounces of melted chocolate for every 1/2 cup of cocoa powder, but reduce the butter slightly to maintain the right consistency.
Why did my cookies spread too much?
Excessive spreading may be due to using warm butter instead of softened butter or not chilling the dough before baking. Ensure the butter is at room temperature and consider chilling the dough for 30 minutes to an hour.
What can I do if my jam filling is too runny?
If your jam filling is too runny, simmer it on the stove to thicken it before filling the cookies. This concentrates the flavor and ensures high-quality results.
What are some alternative fillings for these cookies?
Alternative fillings can include various fruit jams, peanut butter, or even cream cheese frosting. Each option can add a unique twist to the classic thumbprint style.
How can I enhance the flavor without making it excessively sweet?
Consider adding a pinch of espresso powder to the cookie dough or adjusting the amount of sugar slightly. This can enhance the chocolate flavor without overly sweetening.
Is there a way to make the cookies more chocolatey?
To make the cookies richer in chocolate flavor, try adding chocolate chips to the dough or using dark cocoa powder instead of regular cocoa.
Conclusion
Chocolate thumbprint cookies are a delightful blend of simplicity and creativity that can easily fit into any occasion. They offer a wonderful canvas for expression through various fillings and pairings, ensuring that they remain a favorite for cookie lovers.
Whether you're sharing these treats with friends or keeping them all for yourself, their chocolatey goodness is bound to bring joy. Enjoy the process of baking and personalizing each batch to create your own sweet masterpiece.
Recipe Card
Decadent Chocolate Thumbprint Cookies for All Occasions
Ingredients
- 1 cup unsalted butter softened
- 1 cup granulated sugar
- 2 large egg yolks
- 2 teaspoons vanilla extract
- 2 cups all-purpose flour
- 1/2 cup unsweetened cocoa powder
- 1/2 teaspoon baking powder
- 1/4 teaspoon salt
- 1 cup chocolate ganache or fruit preserves for filling
Instructions
- Preheat your oven to 350°F (175°C). Line a baking sheet with parchment paper.
- In a large mixing bowl, cream together the softened butter and granulated sugar until light and fluffy, about 3-5 minutes.
- Add the egg yolks and vanilla extract to the creamed mixture, and mix until well combined.
- In a separate bowl, whisk together the flour, cocoa powder, baking powder, and salt to combine.
- Gradually add the dry mixture to the wet ingredients, mixing until just combined. Do not overmix.
- Using a tablespoon or cookie scoop, drop rounded balls of dough onto the prepared baking sheet, spacing them about 2 inches apart.
- With your thumb or the back of a teaspoon, gently press a well into the center of each cookie dough ball.
- Bake for 10-12 minutes, or until the cookies are set around the edges but still soft in the center.
- Remove cookies from the oven and let cool on the baking sheet for a few minutes before transferring them to a wire rack.
- Once the cookies are completely cooled, fill each thumbprint with chocolate ganache or fruit preserves.
Notes
Additional serving suggestions: pair with a crisp salad, garlic bread, or roasted seasonal vegetables for balance.
For make-ahead, prep components separately and assemble just before heating to preserve texture.
Taste and adjust with acid (lemon/vinegar) and salt right at the end to wake up flavors.


