Introduction
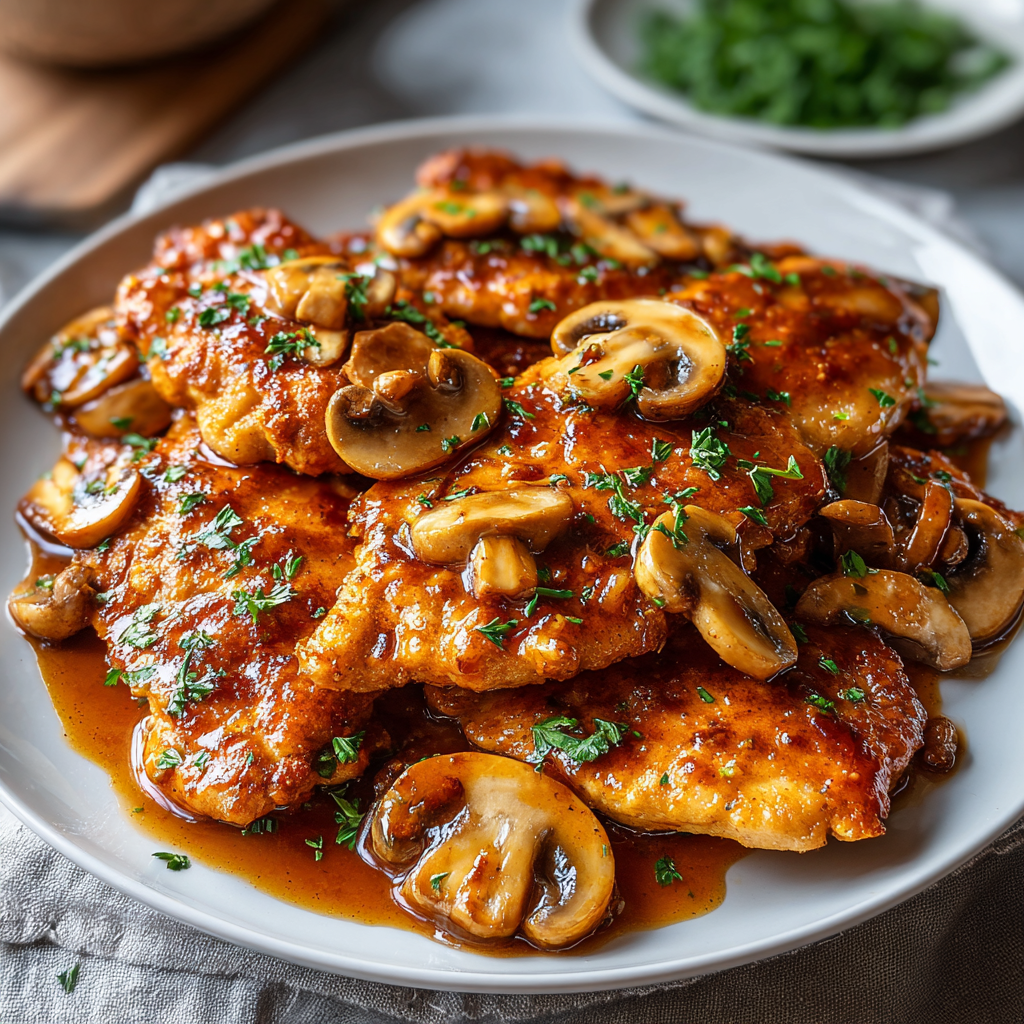
Chicken scallopini is a classic Italian dish known for its tender pan-fried chicken and delightful sauce. It's a perfect choice for those seeking comfort food with a touch of elegance.
The dish features thinly pounded chicken breasts, which cook quickly and absorb the flavors of the sauce beautifully. Serve it over pasta or with a side of vegetables for a complete meal.
Whether you’re hosting a dinner party or enjoying a weeknight meal, chicken scallopini delivers both flavor and ease, making it a favorite in many households.
Ingredients
- 4 boneless, skinless chicken breasts
These provide the main protein for the dish. Pounding them thin ensures they cook quickly and evenly, resulting in a tender bite. - 1 cup all-purpose flour
Used for dredging the chicken, flour creates a light crust that helps develop flavor and texture when sautéed. - 4 tablespoons olive oil
Essential for cooking the chicken, olive oil also adds a rich flavor and helps achieve a golden-brown color. - 4 tablespoons unsalted butter
Butter adds richness to the sauce, balancing the acidity while providing a silky finish to the dish. - 1 cup chicken broth
This forms the base of the sauce, adding depth of flavor and moisture. Use a good-quality broth for the best results. - 1/2 cup white wine
White wine deglazes the pan, capturing the flavorful bits left from cooking the chicken, and adds brightness to the sauce. - 1 tablespoon lemon juice
Fresh lemon juice enhances the dish with a zesty brightness, balancing the richness of the butter and adding complexity. - Salt and pepper to taste
Seasoning is crucial to highlight the flavors of the chicken and the sauce. Adjusting to taste ensures a well-rounded dish. - Chopped parsley for garnish
Adding a sprinkle of fresh parsley not only provides a pop of color but also freshens the dish with herbaceous notes.
Directions & Preparation
Step 1: Pound the chicken breasts to an even thickness.
This step is crucial, as it ensures that the chicken cooks uniformly, preventing dry or overcooked spots. Use a meat mallet or rolling pin, placing the chicken between two sheets of plastic wrap, to pound them to about 1/2 inch thick.
Step 2: Season the chicken with salt and pepper, then dredge in flour.
Seasoning the flour-dusted chicken helps build layers of flavor. Dredging in flour creates a golden crust during cooking, ensuring that the exterior is crispy, enhancing the overall texture.
Step 3: Heat olive oil in a skillet over medium heat.
Choosing the right oil is key; olive oil has a higher smoke point and flavor profile that complements chicken. Preheating the skillet ensures a sear, locking in juices and creating a beautiful crust.
Step 4: Cook the chicken for about 3-4 minutes on each side.
Searing the chicken allows it to develop a nice brown color, which adds complexity to the dish. Proper timing is essential; flipping too soon can cause sticking and tearing.
Step 5: Remove chicken from the skillet and set aside.
Setting the chicken aside preserves its warmth while you prepare the sauce. This brief resting period helps retain moisture in the meat, ensuring each bite is juicy.
Step 6: Add butter to the same skillet, followed by the white wine.
By using the same skillet, you incorporate fond, the flavorful browned bits leftover from cooking the chicken, into the sauce. Butter enriches this foundation with a velvety texture.
Step 7: Stir in chicken broth and return to a simmer.
Bringing the sauce to a simmer allows the flavors to meld and reduces excess liquid, concentrating the taste. The simmering process is vital for achieving a well-rounded sauce.
Step 8: Add lemon juice to the sauce and adjust seasoning.
Lemon juice brightens the dish, balancing fats. Adjusting with salt and pepper at this point ensures the flavors are harmonized before serving.
Step 9: Return the chicken to the skillet, coating it in sauce.
Coating the chicken in sauce reintroduces moisture and flavor, ensuring each piece absorbs the rich sauce's essence before presentation.
Step 10: Garnish with parsley and serve immediately.
Garnishing adds visual appeal and freshness to the dish. Serving immediately when the chicken is hot and the sauce is fresh ensures optimal flavor and texture.

Choosing the Right Chicken Cut
For scallopini, boneless, skinless chicken breasts are ideal due to their tenderness and quick cooking time. Alternatively, thinly sliced chicken thighs can be used for a richer flavor, but ensure they are pounded to achieve a similar uniform thickness.
The Importance of Dredging
Dredging in flour not only helps develop a crispy crust but also thickens the sauce slightly when the fond is deglazed. This technique creates a delightful textural contrast to the tender chicken, enhancing the overall experience of the dish.
Balancing Flavors: Acid vs. Fat
The balance of acid from the lemon juice and the richness from the butter and oil is fundamental to chicken scallopini. This interplay of flavors elevates the dish, providing freshness and preventing it from feeling heavy.
FAQs
What can I do if my sauce is too thick?
If your sauce is too thick, you can add a splash of chicken broth or water, stirring continuously until you reach the desired consistency.
Why does my chicken scallopini taste bland?
Ensure you season the flour well and adjust the seasoning in your sauce after adding the lemon juice. Taste for balance before serving.
Can I use other proteins for scallopini?
Yes, you can use thinly sliced pork or veal as substitutes for chicken. Adjust cooking times based on the thickness of the meat.
How do I know when the chicken is fully cooked?
Chicken is fully cooked when it reaches an internal temperature of 165°F (74°C) and is no longer pink in the center. A meat thermometer is best for accuracy.
What should I do if the chicken is overcooked?
If the chicken turns out dry from overcooking, consider slicing it and serving it in the sauce to help moisten the meat.
Can I use a different type of wine for the sauce?
While dry white wine is preferred, you can substitute it with chicken broth or vermouth if needed, though the flavor will vary.
Conclusion
Chicken scallopini is a beautiful dish that combines simplicity with sophistication, making it ideal for any occasion. By mastering a few basic techniques and balancing flavors, anyone can create this restaurant-quality meal at home.
As you explore variations and make this recipe your own, remember to savor the process. Cooking is as much about the journey as it is about the destination, and chicken scallopini is a perfect dish to enjoy along the way.
Recipe Card

Delightful Chicken Scallopini for Home Cooks
Ingredients
- 4 boneless skinless chicken breasts
- 1 cup all-purpose flour
- 4 tablespoons olive oil
- 4 tablespoons unsalted butter
- 1 cup chicken broth
- 1/2 cup white wine
- 1 tablespoon lemon juice
- Salt and pepper to taste
- Chopped parsley for garnish
Instructions
- Pound the chicken breasts to an even thickness.
- Season the chicken with salt and pepper, then dredge in flour.
- Heat olive oil in a skillet over medium heat.
- Cook the chicken for about 3-4 minutes on each side.
- Remove chicken from the skillet and set aside.
- Add butter to the same skillet, followed by the white wine.
- Stir in chicken broth and return to a simmer.
- Add lemon juice to the sauce and adjust seasoning.
- Return the chicken to the skillet, coating it in sauce.
- Garnish with parsley and serve immediately.
Notes
Additional serving suggestions: pair with a crisp salad, garlic bread, or roasted seasonal vegetables for balance.
For make-ahead, prep components separately and assemble just before heating to preserve texture.
Taste and adjust with acid (lemon/vinegar) and salt right at the end to wake up flavors.