Introduction
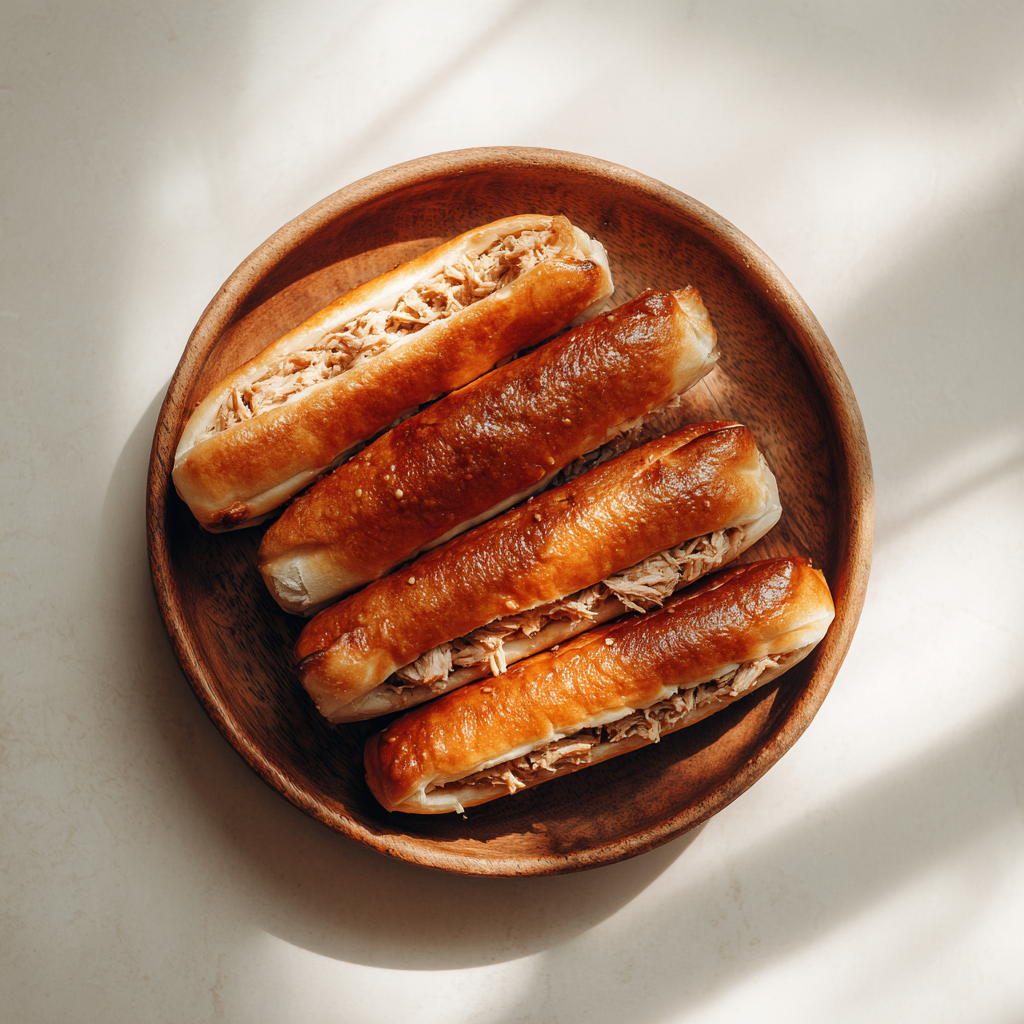
Tuna & Cheese Cigars are a delightful twist on classic savory snacks. Combining flaky tuna with rich cheese, these cigars offer a balance of flavors that is both appealing and satisfying.
Perfect as appetizers, party snacks, or even a light meal, they are quick to prepare and can be served warm or at room temperature. With just a few ingredients and minimal effort, these cigars can elevate your meal or gathering.
Ingredients
- 1 can (5 oz) tuna, drained
Tuna serves as the primary protein in this dish, providing a rich, savory flavor and a satisfying texture. It is also packed with nutrients, making the dish not only delicious but also nutritious. - 1 cup shredded cheese (cheddar or mozzarella)
Cheese adds creaminess and depth to the filling, melting to create a deliciously gooey interior. Its flavor complements the tuna wonderfully, enhancing the overall taste of the cigars. - 4 large flour tortillas
Tortillas act as the wrapper for the tuna and cheese mixture, providing a flexible base that holds everything together. They can be easily rolled into the cigar shape and crisp up nicely when baked. - 2 tablespoons mayonnaise
Mayonnaise binds the filling ingredients together, helping to create a cohesive texture. It adds moisture and richness, which keeps the filling from being too dry. - 1 teaspoon garlic powder
Garlic powder infuses the filling with a robust flavor, enhancing the overall taste without overwhelming the other ingredients. It adds a subtle aroma that makes these cigars even more enticing. - 1/2 teaspoon paprika
Paprika brings a hint of sweetness and smoky flavor, adding depth to the overall profile. It also contributes to the beautiful color of the finished cigars, making them visually appealing. - Salt and pepper to taste
Seasoning is essential for elevating the flavor of any dish. Salt and pepper enhance all the other ingredients, ensuring a well-rounded and enjoyable taste experience. - Cooking spray or olive oil for brushing
A light spray or brush of oil helps to brown the cigars in the oven. This step adds a crispy texture and an appealing golden color to the exterior.
Directions & Preparation
Step 1: Preheat the oven to 400°F (200°C).
Preheating the oven ensures that your Tuna & Cheese Cigars will cook evenly and achieve that perfect crispiness. An adequately heated oven is crucial for a golden-brown tortilla and properly melted cheese.
Step 2: In a mixing bowl, combine the drained tuna, shredded cheese, mayonnaise, garlic powder, paprika, salt, and pepper.
Mixing the filling ingredients thoroughly ensures that each bite is packed with flavor. The combination of moisture from the mayonnaise and richness from the cheese will create a deliciously cohesive filling that binds together easily.
Step 3: Lay a tortilla flat on a clean surface and spoon 2-3 tablespoons of the filling near one edge.
Placing the filling towards one edge makes it easier to roll up the tortilla into a cigar shape. Be careful not to overfill, as this can make rolling cumbersome and lead to leaks during cooking.
Step 4: Roll the tortilla tightly around the filling, tucking in the ends as you go to secure the filling inside.
Rolling tightly helps maintain the shape of the cigars and prevents the filling from spilling out during baking. Tucking in the ends is crucial for keeping everything contained and allows for a nice presentation.
Step 5: Place the rolled cigars seam-side down on a baking sheet lined with parchment paper.
Lining the baking sheet with parchment paper helps prevent the cigars from sticking, making cleanup easier. Arranging them seam-side down also ensures they maintain their shape while baking.
Step 6: Lightly spray or brush the cigars with cooking spray or olive oil.
Applying oil gives the cigars a beautiful golden color and crispy texture, enhancing the overall eating experience. This step is important for achieving that visually appealing finish.
Step 7: Bake in the preheated oven for 15-20 minutes, or until golden brown and crispy.
Monitoring the baking process is key—once the cigars become golden brown, they are beautifully crisp, ready to be served. The cheese inside should also be melted, providing the perfect contrast to the crispy exterior.
Step 8: Remove from the oven and let cool slightly before serving.
Allowing the cigars to cool for a few minutes makes them easier to handle and prevents burns. This step also allows the filling to set slightly, enhancing the overall texture and flavor experience.

Creative Variations on Tuna & Cheese Cigars
Experimenting with different cheeses or adding in herbs can bring your Tuna & Cheese Cigars to a new level. Consider using a pepper jack for a spicy kick, or adding cooked spinach for extra nutrition. Think beyond the traditional tuna; try substituting canned salmon or even crab for a unique twist that caters to your taste preferences.
Serving Suggestions That Wow
These cigars pair excellently with various dipping sauces or sides. Consider serving them with a homemade spicy mayo or a classic marinara for a touch of zest. For a more complete meal, add a fresh salad tossed with vinaigrette or crunchy vegetable sticks, making your presentation not just delightful but also well-balanced.
Maximizing Flavor Without Extra Effort
To ensure your Tuna & Cheese Cigars are bursting with flavor, don’t hesitate to experiment with spices in your filling. Consider adding a splash of hot sauce or a sprinkle of your favorite Italian seasoning mix. Even a handful of chopped fresh herbs can enhance the flavor profile significantly, creating a gourmet experience with little extra work.
FAQs
What can I do if my filling is too thick?
If the filling seems too thick, adding a small amount of mayonnaise or a splash of water can help loosen it up. This adjustment makes it easier to spread and roll the cigars.
What should I do if the cigars are bland?
Blandness can be adjusted by increasing the seasonings. Adding more salt, pepper, or even a splash of lemon juice can elevate the flavors dramatically.
How can I ensure my cigars are perfectly crispy?
To achieve a crispy surface, make sure your oven is properly preheated and consider rotating the baking sheet halfway through cooking to ensure even browning.
Can I use a different kind of cheese?
Absolutely! Feel free to substitute in your favorite cheese. Try feta for a tangy flavor or gouda for a richer taste, depending on your preference.
What if I can't find tortillas?
If tortillas are unavailable, consider using phyllo dough or spring roll wrappers as a creative alternative—just be aware of adjusted baking times.
Can I add vegetables to the filling?
Yes! Adding finely chopped vegetables like bell peppers, onions, or spinach can enhance nutrition and add flavor; just ensure they are cooked or softened beforehand to prevent excess moisture.
Conclusion
Tuna & Cheese Cigars are versatile, allowing for personal touches that can reflect your culinary style. With simple ingredients and clear directions, they make a perfect snack or appetizer.
Preparing them boosts your confidence in the kitchen, showcasing your creativity while delighting family and friends with every bite. Try making these cigars today and see how they can transform your dining experience.
Recipe Card
Delicious Tuna & Cheese Cigars for Home Cooks
Ingredients
- 1 can 5 oz tuna, drained
- 1 cup shredded cheese cheddar or mozzarella
- 4 large flour tortillas
- 2 tablespoons mayonnaise
- 1 teaspoon garlic powder
- 1/2 teaspoon paprika
- Salt and pepper to taste
- Cooking spray or olive oil for brushing
Instructions
- Preheat the oven to 400°F (200°C).
- In a mixing bowl, combine the drained tuna, shredded cheese, mayonnaise, garlic powder, paprika, salt, and pepper.
- Lay a tortilla flat on a clean surface and spoon 2-3 tablespoons of the filling near one edge.
- Roll the tortilla tightly around the filling, tucking in the ends as you go to secure the filling inside.
- Place the rolled cigars seam-side down on a baking sheet lined with parchment paper.
- Lightly spray or brush the cigars with cooking spray or olive oil.
- Bake in the preheated oven for 15-20 minutes, or until golden brown and crispy.
- Remove from the oven and let cool slightly before serving.
Notes
Additional serving suggestions: pair with a crisp salad, garlic bread, or roasted seasonal vegetables for balance.
For make-ahead, prep components separately and assemble just before heating to preserve texture.
Taste and adjust with acid (lemon/vinegar) and salt right at the end to wake up flavors.